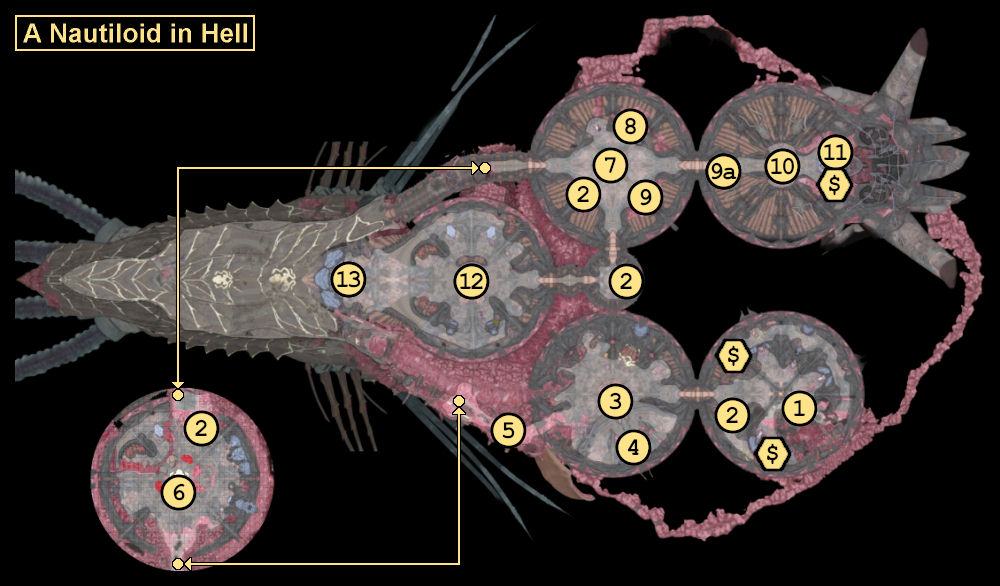
In this quest walkthrough, we’ll walk you through the game’s opening sequence, in which your character tries to escape the Mind Flayer ship — and finds a few companions along the way. See A Nautiloid in Hell for the region guide.
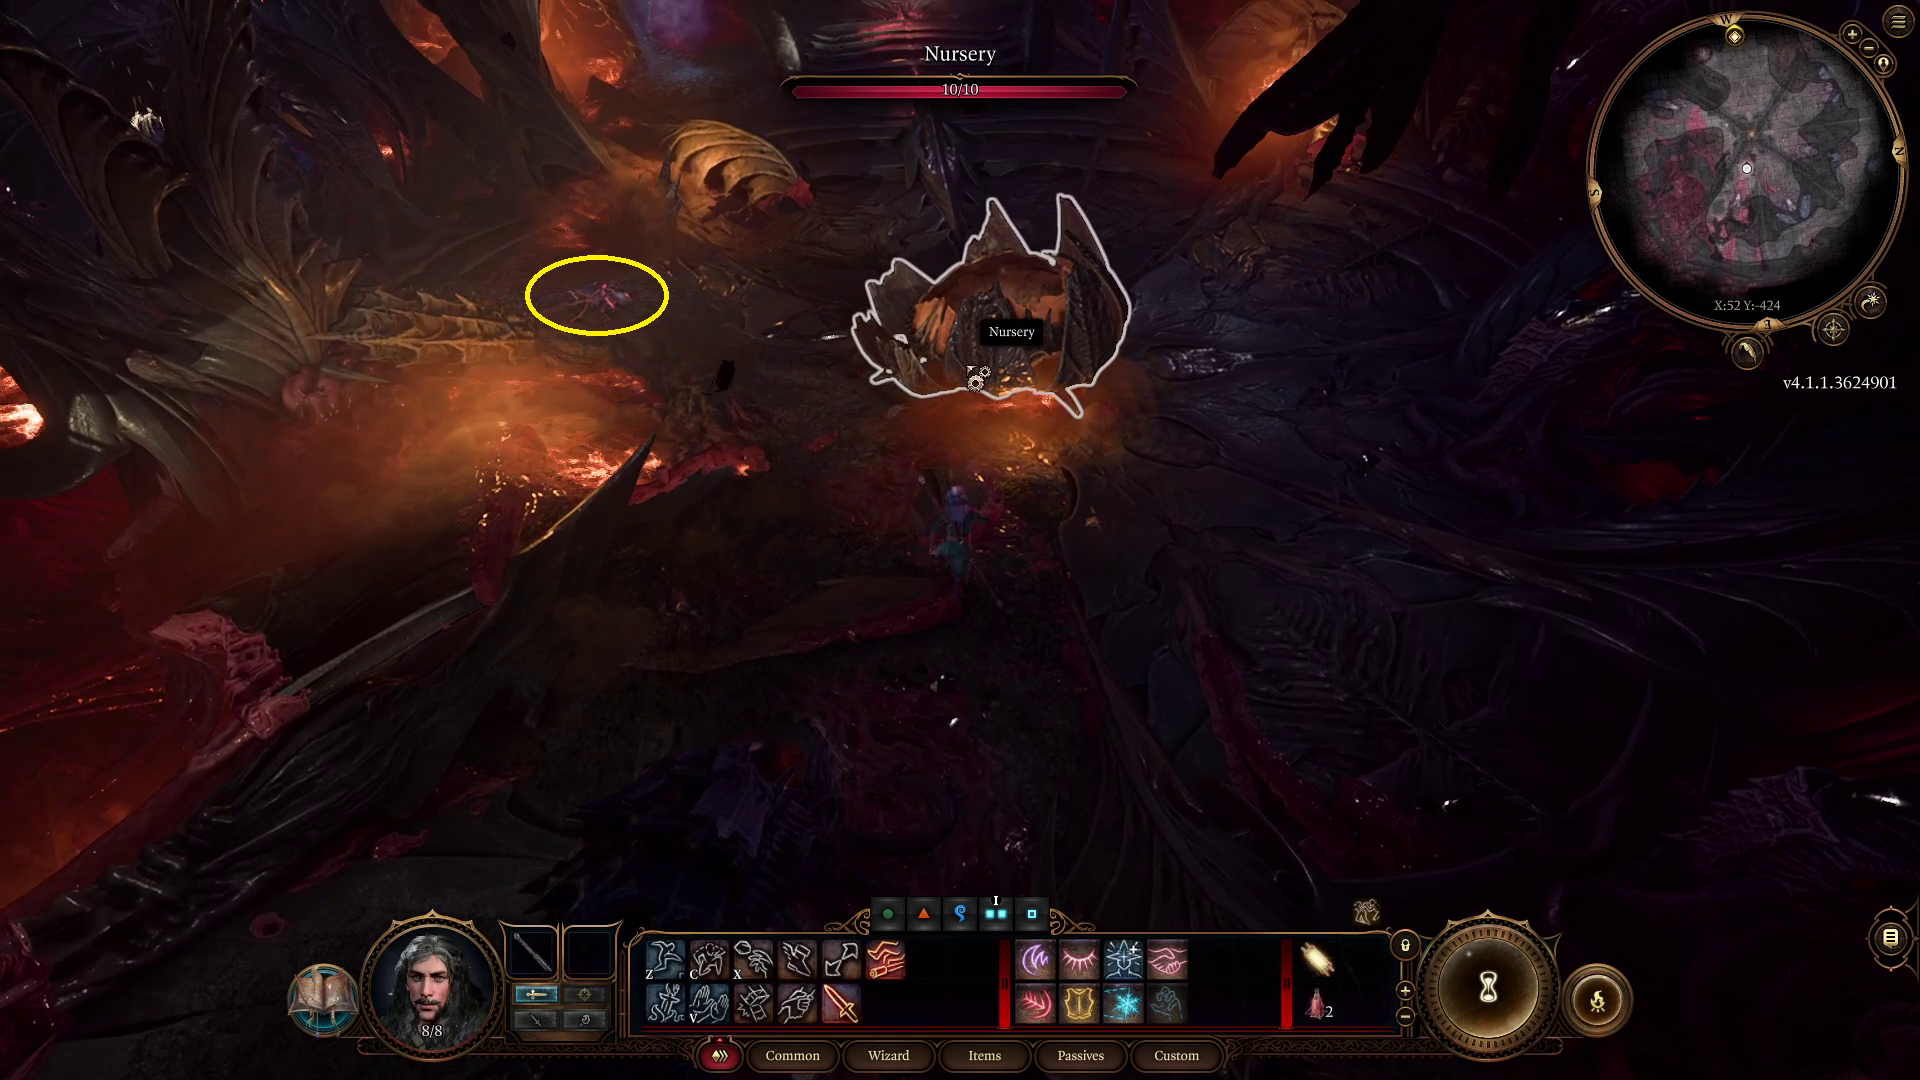
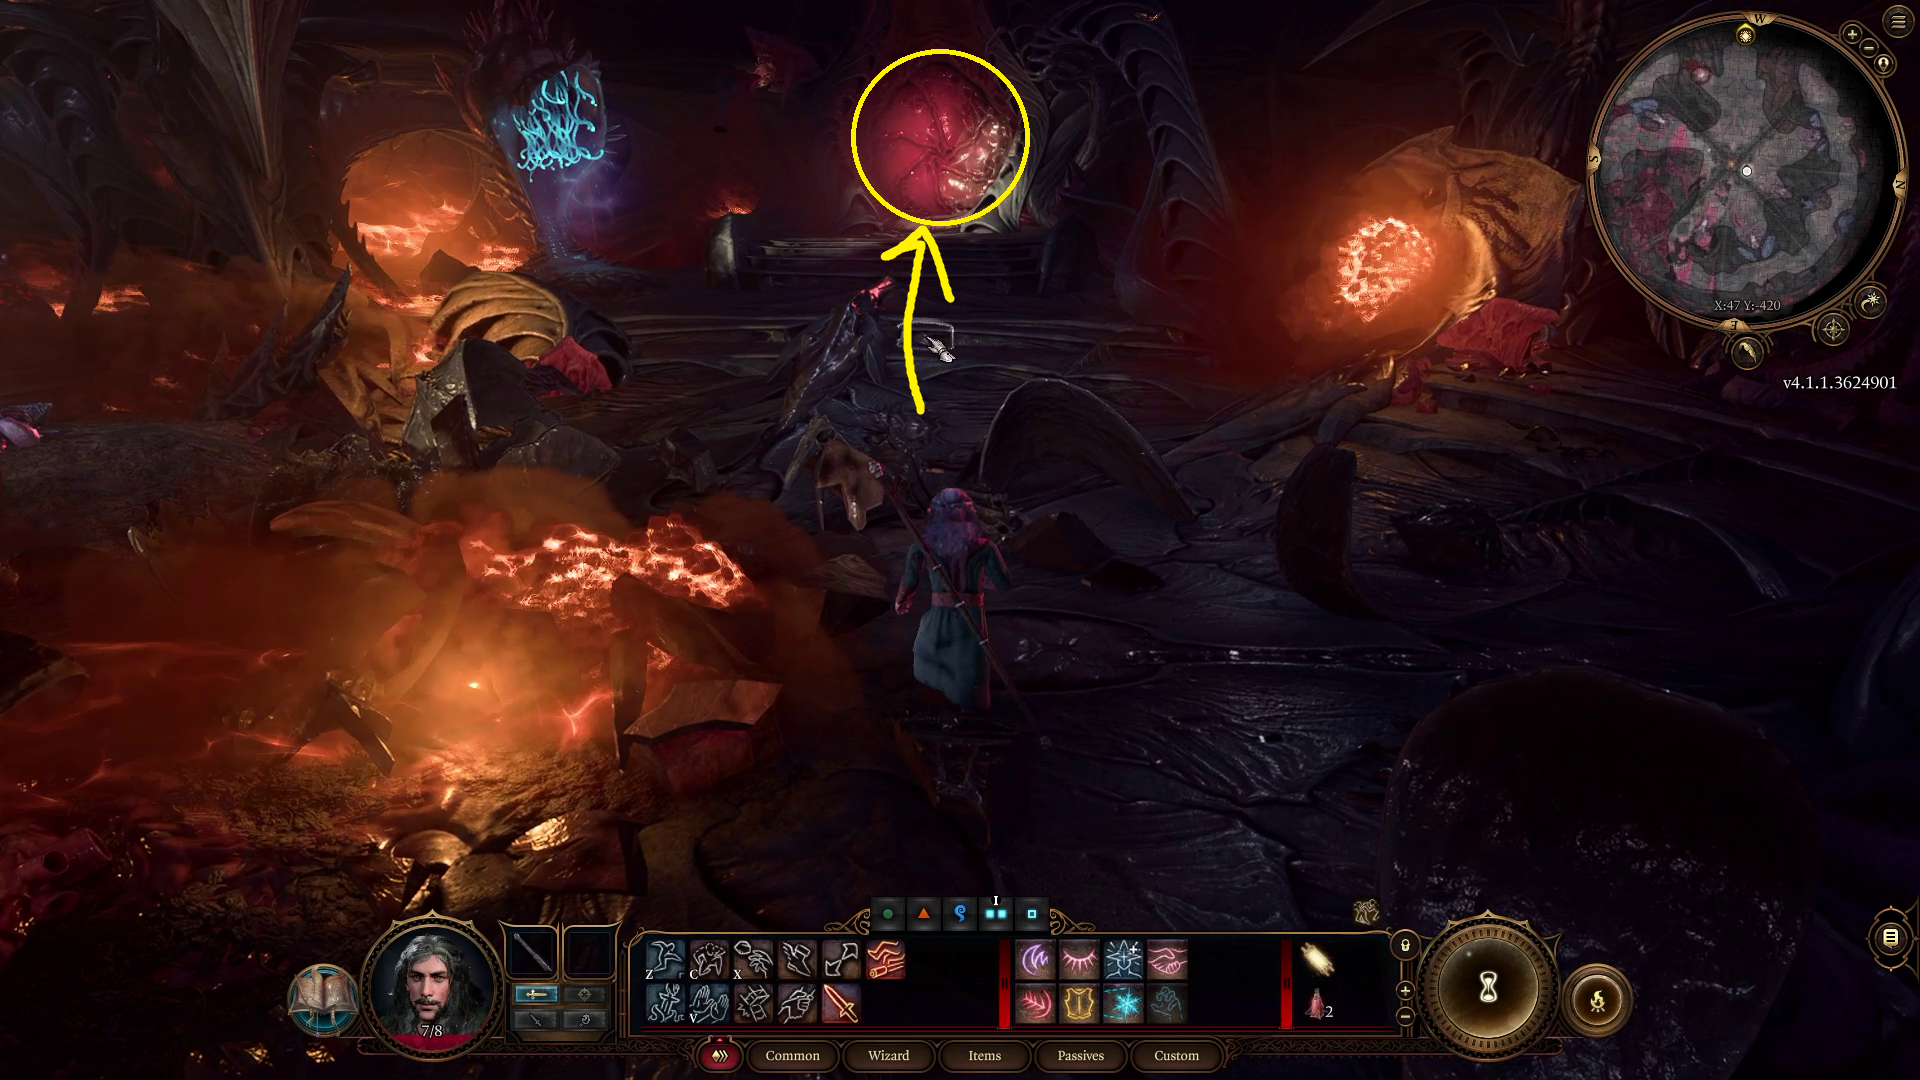
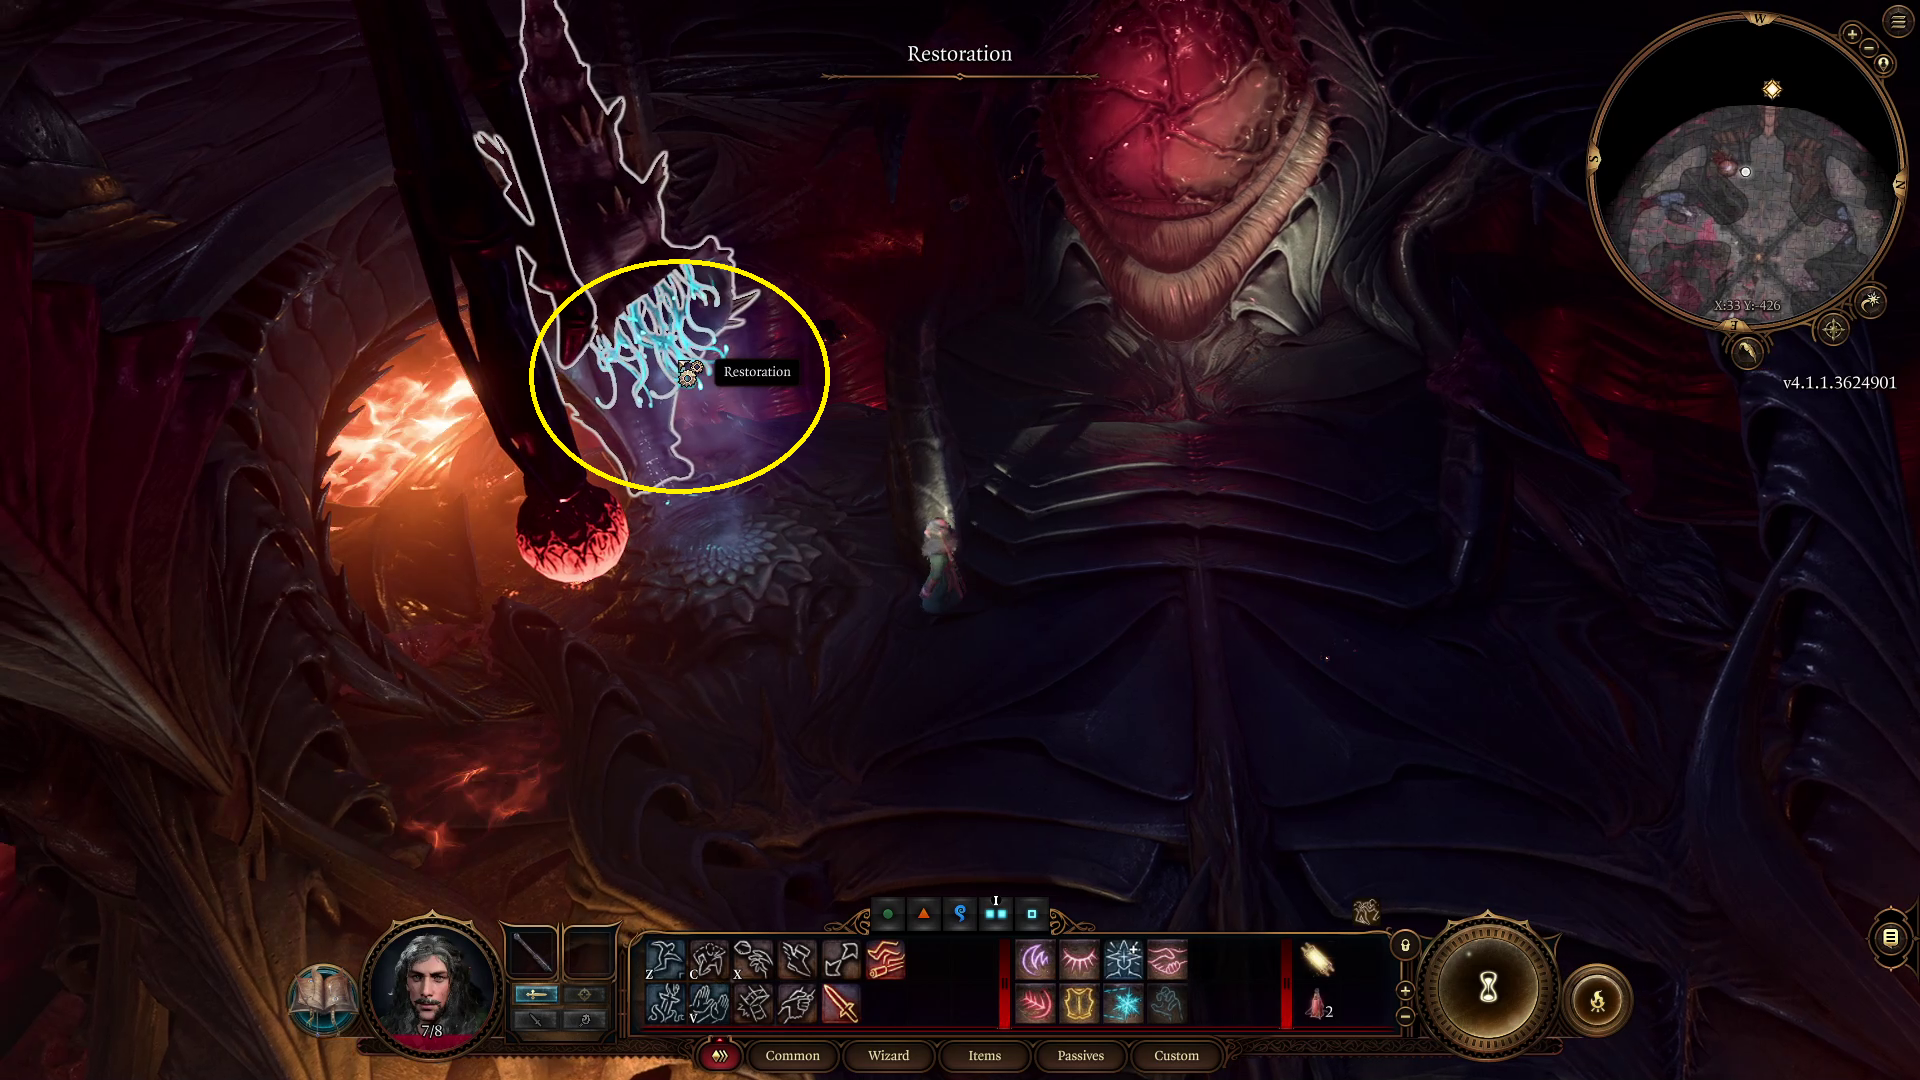
The game begins with your character awakening and hopping out of a mind flayer pod (Map 1). In the center of the chamber is a nursery you can interact with, but it doesn’t appear you can gain anything from doing so (except possibly losing some HP). The mind flayer corpse next to it (Image 1), on the other hand, has some loot on it. Corpse robbed, you can climb ramps to reach the upper part of the chamber, where you’ll find some chests to loot. Then climb back down and leave the room via the “Sphincter” door on the western wall (Image 2). If you interacted with the nursery and took damage, you can heal at the restoration point just to the left of the door (Image 3, Map 2).
Image 1Image 2Image 3
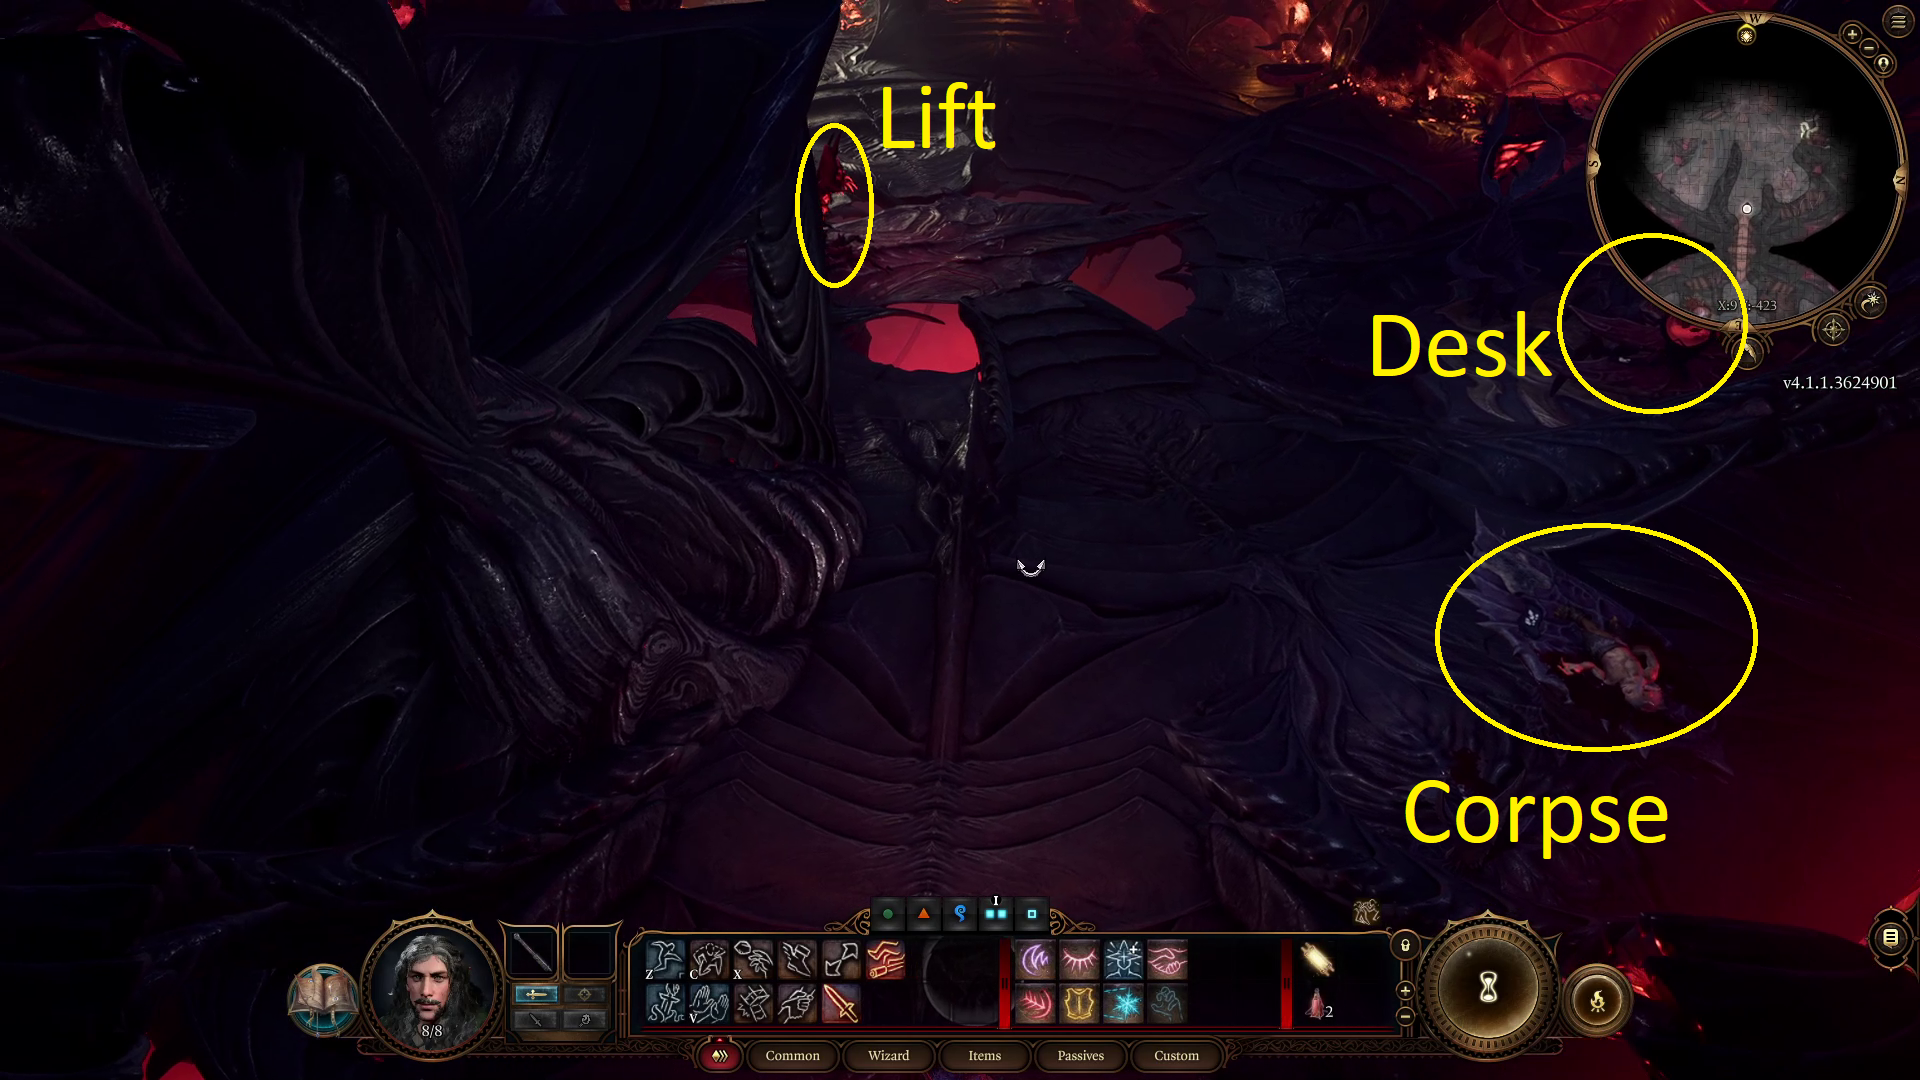
In the next room, you’ll see a goblin corpse on a table to your right, with a rune slate next to it. A desk on the northern wall has a few more rune slates you can grab (assuming you’re the typical RPG-playing hoarder). Finally, head over to the lift control — the Neural Apparatus (Map 3) — and activate it to ride up to the balcony.
Image 4
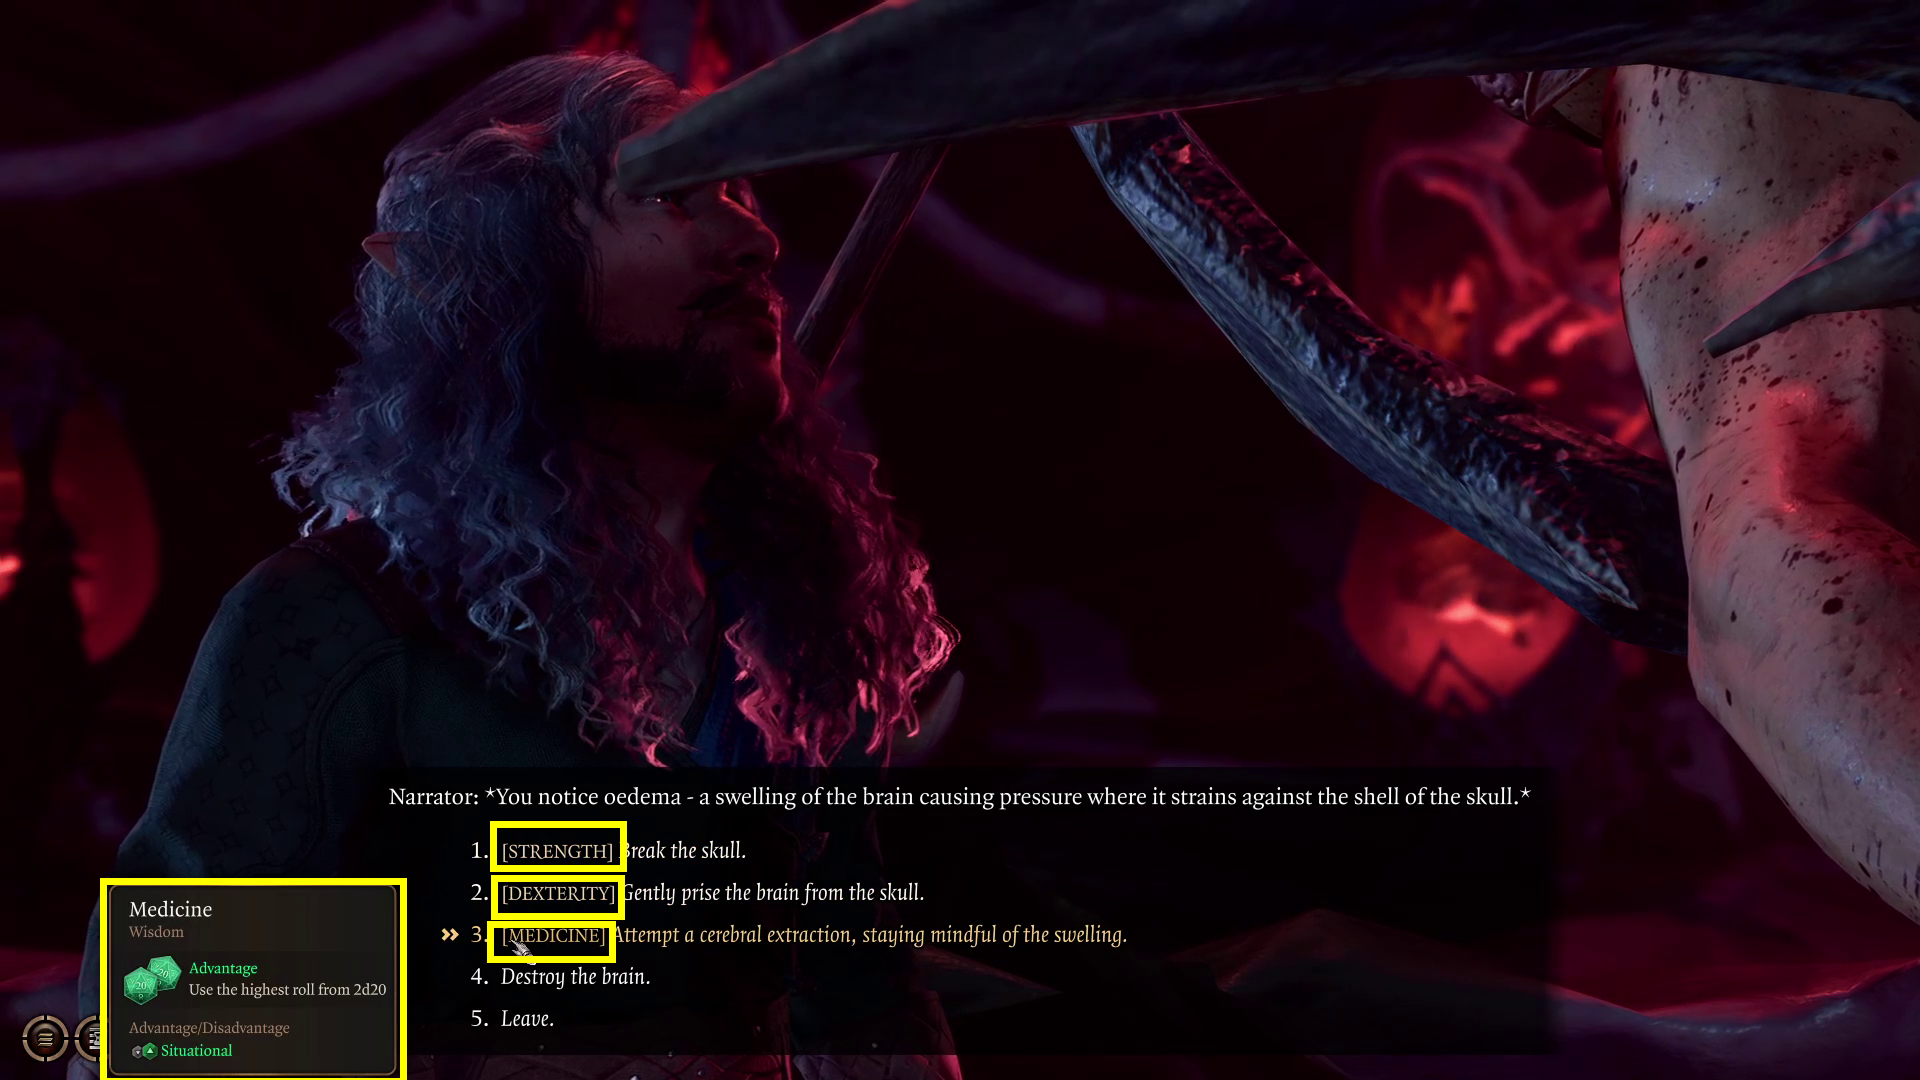
There you’ll find a body — Myrnath — on an examination bed (Map 4). Walk over and interact with Myrnath to begin a dialog. Depending on your character’s abilities, you may be able to extract the intellect devourer in the corpse’s skull — doing so will grant you a useful ally for the combat sections ahead, so it’s well worth attempting to extract the brain. The first few dialog options don’t matter, and then you’ll be be given Investigation, Strength, and Dexterity choices, plus “destroy the brain” and “leave.” Pick Investigation, as succeeding will make extracting the brain easier.
If successful, you’ll be able to choose “[Medicine] Attempt a cerebral extraction”, which is a choice with Advantage. (Advantage means you get to roll two dice and pick the higher value, so this is going to almost always be the best choice). Otherwise, hover the all-caps segment of each choice (or press in on the right stick) to display the tooltip for each choice, and pick the one with the most bonuses.
Image 5 – Hovering the highlighted portion of each choice (or pressing in on the right stick) will let you see the bonus or penalties that will be applied to your Ability Check
If you extract the intellect devourer, then you’ll learn it’s named Us, and you’ll be given the option to “mutilate” it. This will require you to pass a DC-15 Dexterity check. If you’re successful, then you’ll lobotomize the poor creature, which will reduce its maximum health by 6 and its Intelligence and Wisdom by 4 — but not give it any bonuses. If you fail, then Us will screech at you and run away, and it’ll disappear from the ship.
After setting Us down, ask it a few questions if you like — among other things, it’ll mention that you’re in Avernus, the first of the Nine Hells — and then select “All right, let’s go.” (Unless you’re very afraid of brains, it’s best that you take Us with you).
Reach the Helm
Get back on the lift and use the Neural Apparatus to ride back down to the ground level, then continue west-southwest onto the path that leads outside. A cutscene will play, in which you’ll meet a GithyankiFighter named Lae’zel (Map 5). After speaking with her, combat will begin (Map 6).
It’s a good idea to save your game at this point — even though this is the first fight in the game, you can still die if you play really badly. Take your time and make sure you understand what you’re doing before you give a command — there’s no undo! You can cancel a selected action before you go through with it, however, by pressing / / . If you have Us with you, having it go into melee and tanking damage can ensure the other characters stay alive.
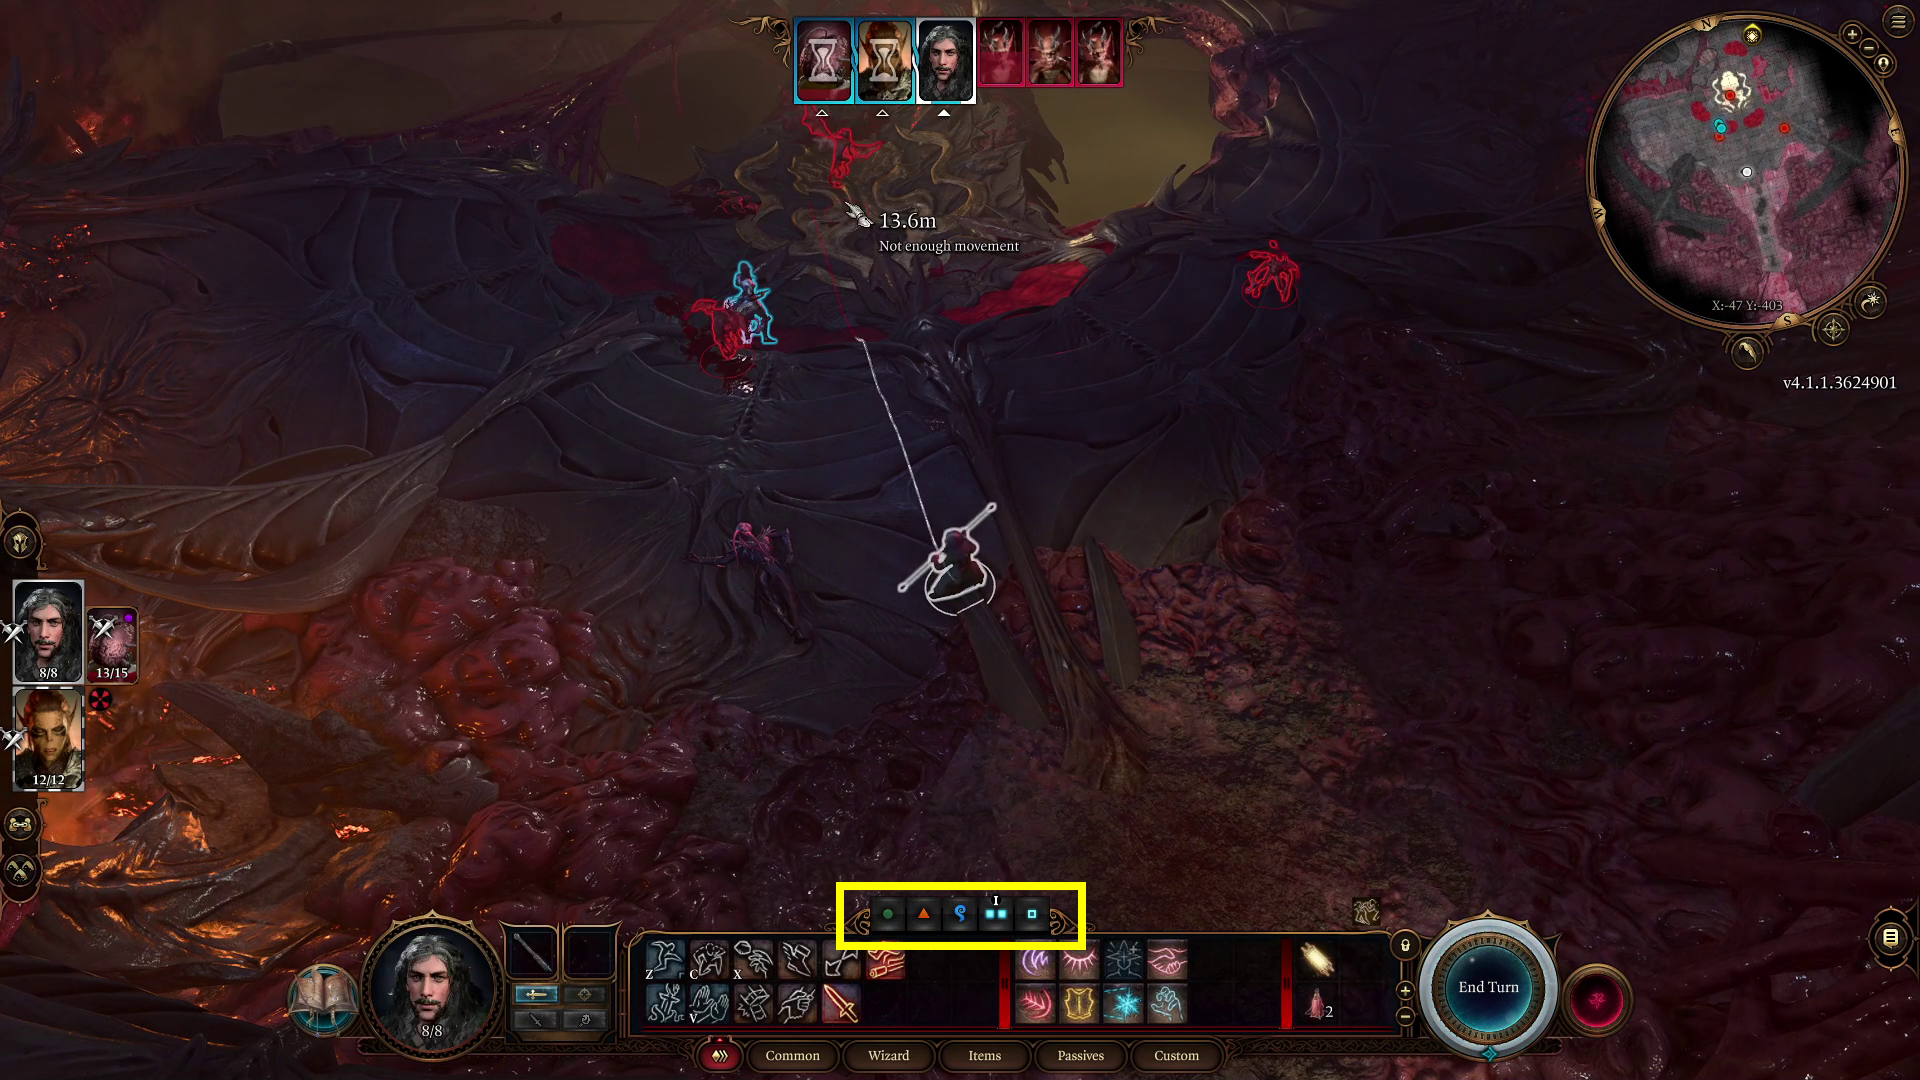
Image 6 – By clicking the filters above the hotbar, you can see which abilities and spells use your Action (the green circle), your Bonus Action (the orange triangle), as well as which spells take a spell slot or are useable as many times as you want (cantrips)
After defeating the imps, loot their corpses and the corpses nearby (don’t forget you can highlight lootable objects), then head to the northern side of the room (Image 7). Use the restoration point (Image 8, Map 2), loot the nearby corpse, and then climb up the two Arterial Meshes and enter the next room.
Image 7Image 8
Upon entering, you’ll be facing a control console connected to a couple of Sacrificed Cultists on nearby beds (Map 7). With enough Arcana, you’ll decipher that the three buttons on the console are labeled (from left to right) “Unleash,” “Aggression,” and “Annihilate.” The first button won’t do anything, the second button will turn the cultists hostile and start a fight, and the third button will kill the cultists. If you defeat the cultists in battle, then you’ll earn 10xp each. If the cultists die, then you’ll be able to grab some minor loot from their corpses.
Note: If you want to kill the cultists in combat, then the easiest way is to attack them while they’re still connected to the console. They won’t fight back this way, and you’ll still earn 10xp and be able to loot them. Similarly, you can force attack the intellect devourer wandering around in the room. It’ll give you another 10xp, and Us won’t mind.
In the back of the room, you might notice a woman yelling to be let out of a mind flayer pod (Map 8). This is Shadowheart, a Half-ElfCleric. You can free her by completing the quest Rescue the Illithid’s Captive, and then choose to let her join your party. Regardless of whether you help Shadowheart here or not, she’ll become available as a companion later in the game.
In the room to the east, you’ll discover three things of interest:
A dead thrall with a Gold Key (Map 9a). The key will unlock the elaborate reliquary in Shadowheart’s room (Map 9), inside of which you’ll find some minor loot.
Another woman in a mind flayer pod (Map 10). This one can’t be saved. If you interact with the console behind the pod, then the woman will transform into a ceremorph — a possible glimpse into your future. During Early Access it was possible to kill the ceremorph, but that is no longer the case.
Once you’ve completed everything you want to do in the nautiloid, you should head south from Shadowheart’s room. You’ll enter a small antechamber with a restoration point in it (Map 2). Heal up your party if necessary, and then move west into the helm (Map 12). When you do, a cutscene will play, where you’ll witness a battle between mind flayers and the forces of Hell. The last remaining mind flayer will command you to “connect the nerves of the transponder,” and then it will focus its attention on the devil Commander Zhalk. At the end of the cutscene, you’ll find yourself in combat.
Connect the Nerves of the Transponder
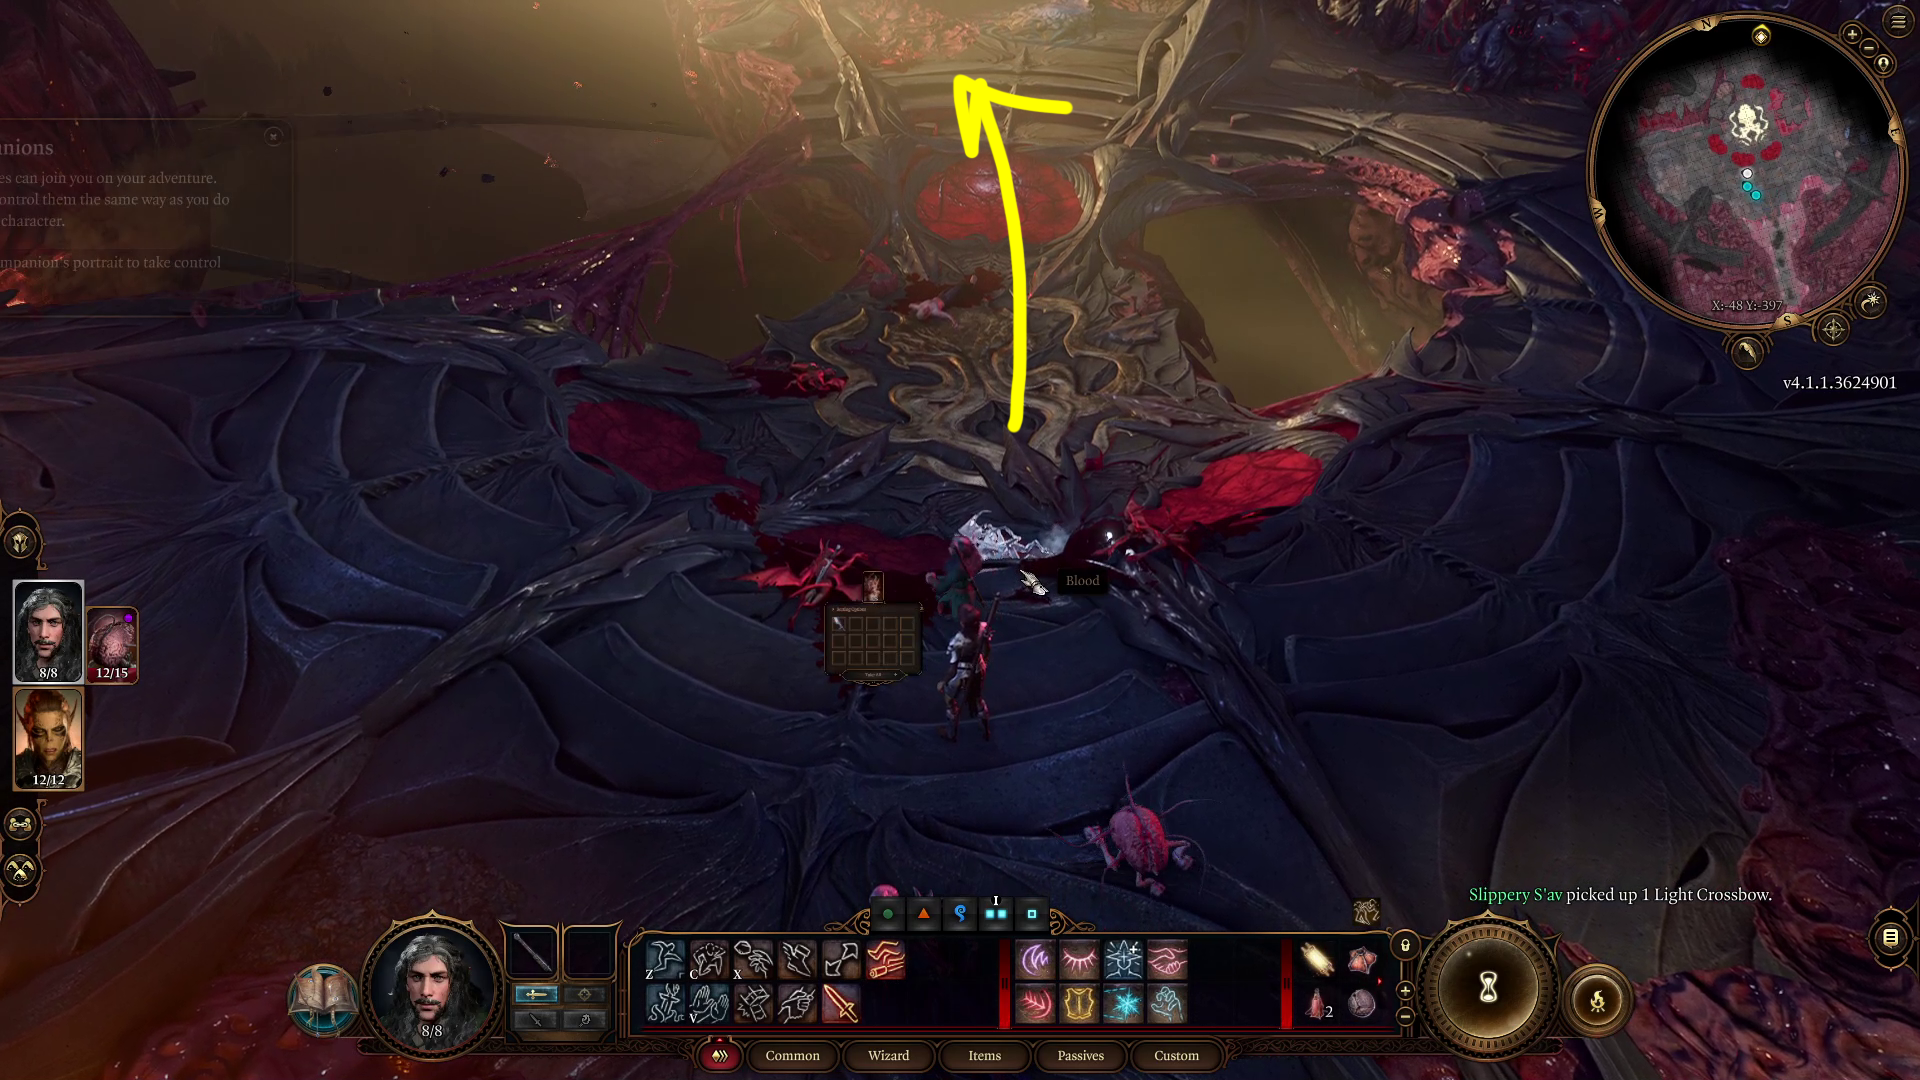
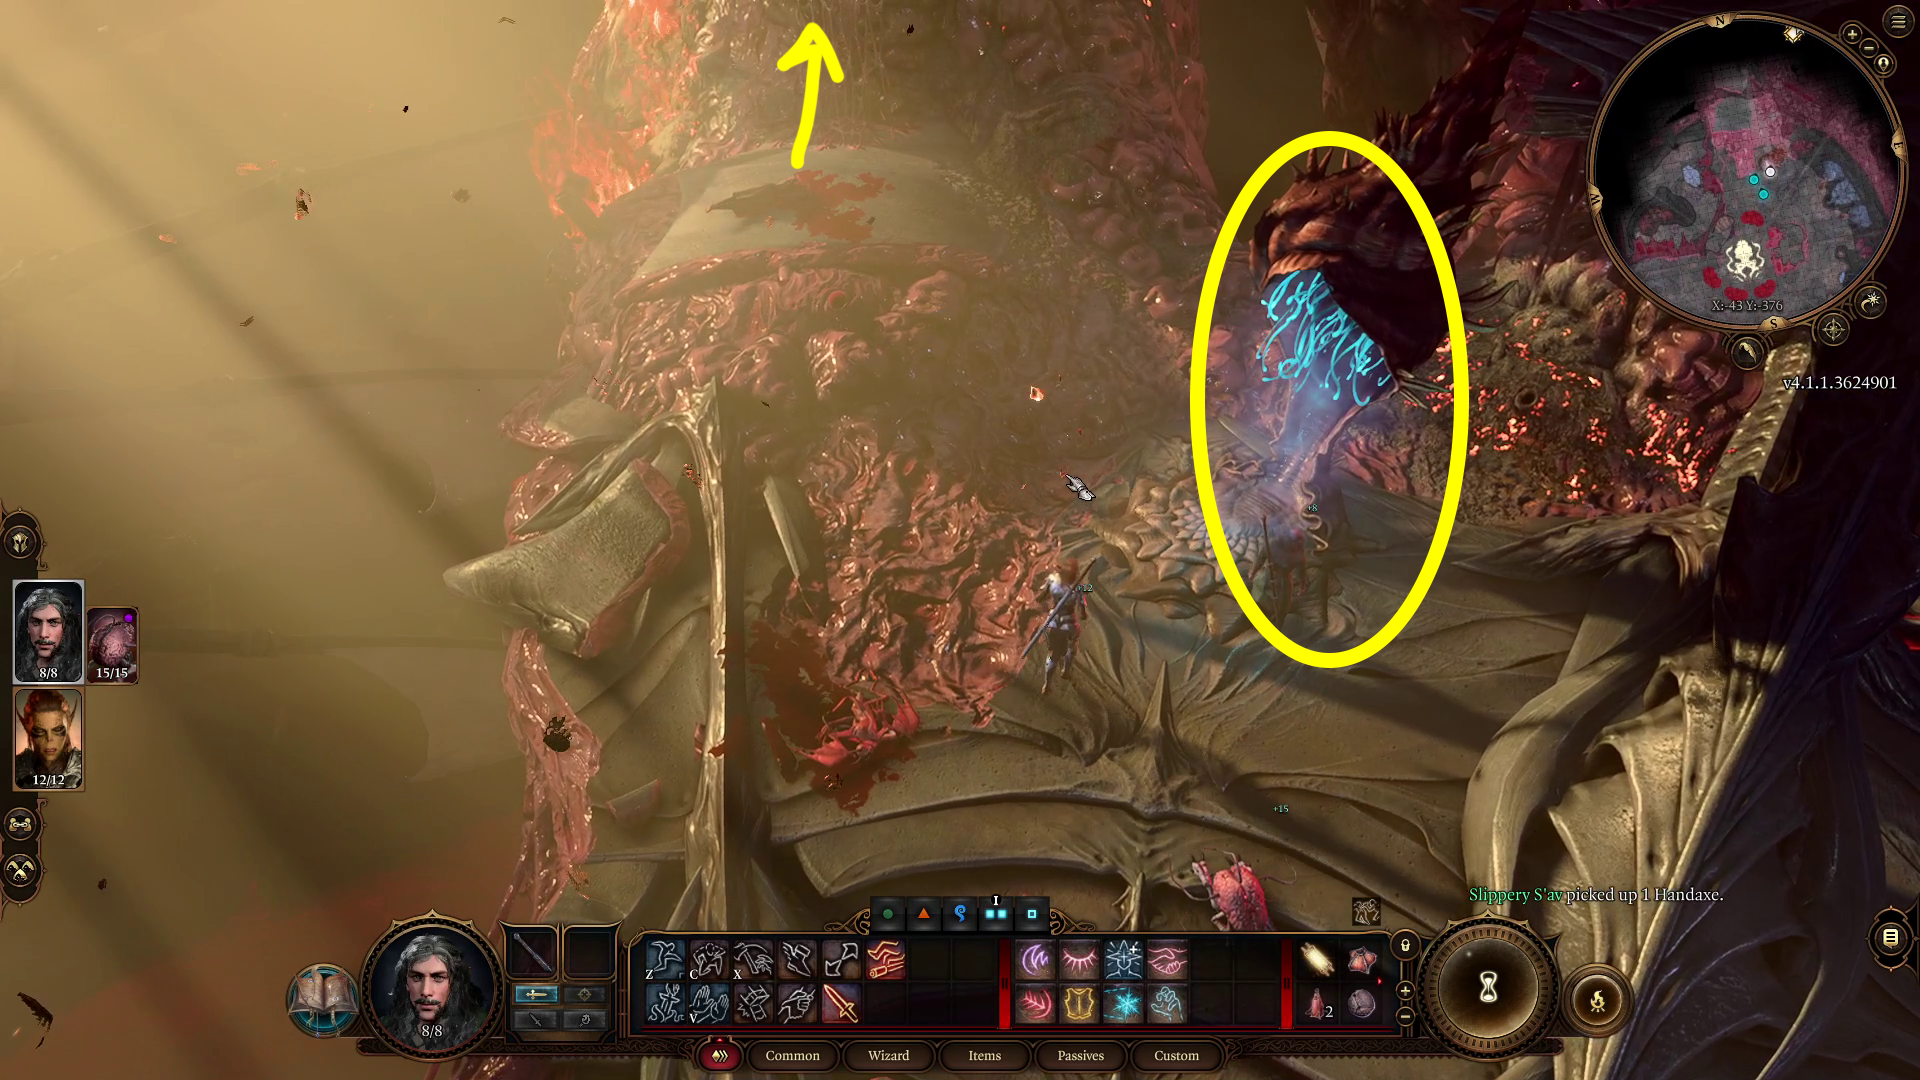
Don’t let the countdown timer stress you out — you should have plenty of time to make it to the controls. Focus down the nearest enemy with your whole party, and make your way west across the room. You can choose to ignore Comander Zhalk and only kill the other enemies on your way to the transponder (Map 13). As you go past him, make sure you have Lae’zel in the front of the party as you go up the stairs past where Zhalk and the mind flayer are fighting — once one of your party members gets past those two (Image 9), a brief cutscene will play and more enemies will spawn.
Image 9 – Crossing the indicated line will spawn a few more enemies
However, it’s worth noting that you can get the Everburn Blade by killing Zhalk, and he’ll focus on the mind flayer as long as it’s alive, so it can be worth trying to take him down. See our Commander Zhalk & the Everburn Blade guide for some advice about how to defeat him.
Whatever you decide, it’s best to clean up the regular enemies as you go. Once they’re all taken care of, send a character to interact with the transponder at the westernmost end of the room (Map 13). Note that Us can’t interact with the transponder, so you’ll have to get another character to it. Interacting with the transponder will end the quest “Escape the Nautiloid” and start a cutscene. When it ends, you’ll be back on solid ground!
Unabashed FromSoftware fanboy still learning to take his time with games (and everything else, really). The time he doesn't spend on games is spent on music, books, or occasionally going outside.